7 Tips for Drawing Beautiful Knitting Pattern Schematics
How do you feel about schematics? If you’re like many knitting pattern designers, you likely feel a bit lost when it comes to drawing them. You know how you want your schematics to look, but getting that to translate into the drawing is difficult!
When I went to university to study Fashion Knitwear Design, I took classes on how to draw “fashion flats” or “flat drawings”, which are essentially schematics.
In industry, fashion flats are often used to communicate the technical specifications of a garment design to the factory that will be making it. If you think about it, that’s kind of what we do as knitting pattern designers, too!
I’ll be honest - I didn’t take to flat drawing very easily. I find digital drawing difficult and it was hard to get my fashion flats to look like the garments that they were supposed to be!

Despite my difficulties, my university teacher gave me some great tips that made flat drawing a lot easier. In the years since, I’ve also come up with some tricks of my own that make me feel much more confident when drawing knitting pattern schematics. I’m still not an expert, but schematics are no longer a chore and I want the same for you, too.
In this blog post, I am sharing 7 tips and tricks I’ve learnt over the last few years that will simplify the process and give you better results when drawing knitting pattern schematics. Let’s get started.
1. Use a vector graphics programme
I know it’s tempting to draw schematics by hand and scan them into your knitting patterns, but you won’t get the best results this way. A vector graphics programme will help your schematics to look clearer, neater and more professional. A big benefit is that you will also be able to scale the schematic without the lines getting blurry or distorted.
When I was at university, I used Adobe Illustrator for flat drawing, but now I use a free program called Inkscape. It has quite a learning curve, but once you get used to it, it creates amazing results.
2. Make use of layers
Layers are a feature offered by most vector graphics programmes and allow you to draw different sections of your schematic on different layers. You can label each layer to help you stay organised and lock layers that are complete so that you don’t accidentally move or delete parts of your drawing.
When I was a student, I didn’t see the point of using layers, despite what my teacher told me! I’d draw every section of my fashion flats on the same layer and would end up accidentally moving around lines and sections of my drawing whilst I was trying to draw other sections. It was a mess!
Since I started drawing my own knitting pattern schematics, I have learned how useful layers can be. It takes away a lot of the stress from the process.
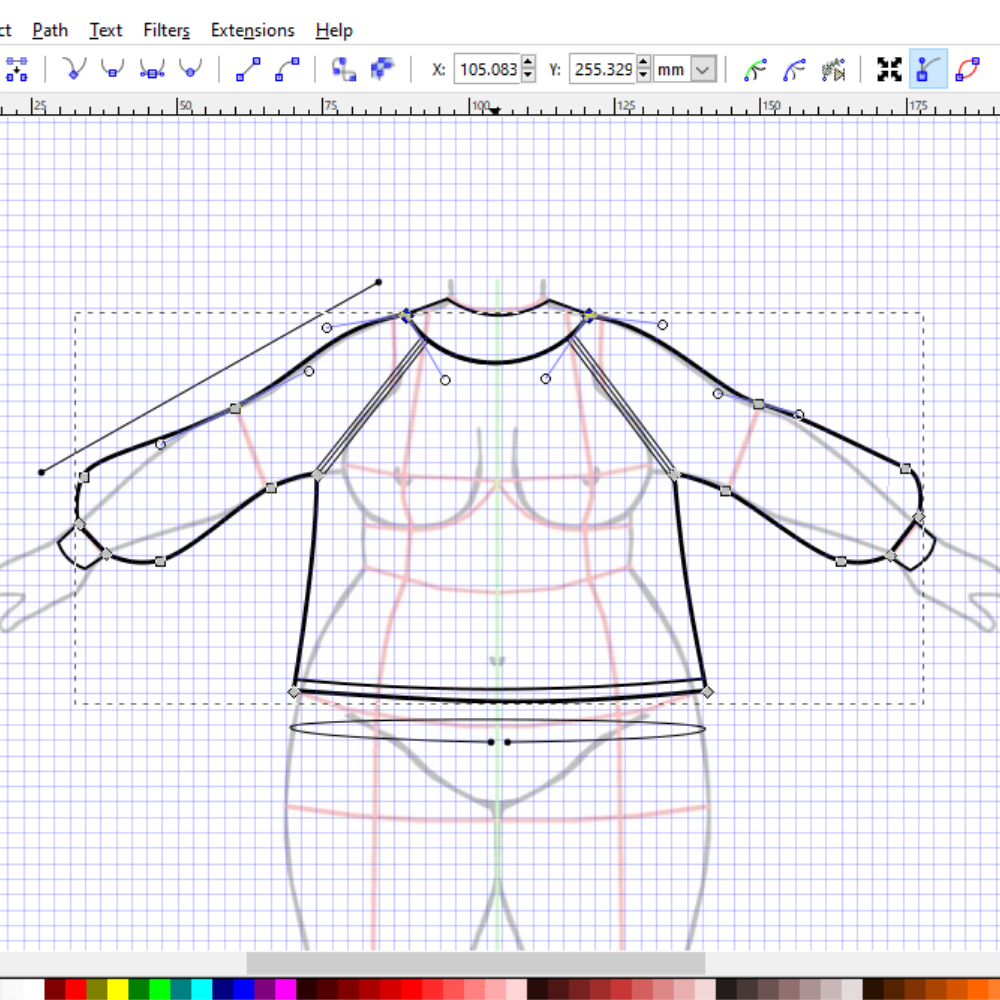
3. Use a croquis or template
My teacher often used to use body templates as the basis of his flat drawings. They helped him to make his garment drawings proportional. This is something that I continue to do to this day.
You can add the body template to the bottom layer of your schematic drawing, reducing the opacity so that the template is only just visible. Draw your schematic on the layers on top of the template, toggling the visibility of the template on and off to see how the drawing is progressing. Once you’re done, you can delete the layer with the template, leaving you with a beautiful, finished schematic.
4. Put the grid on
Again, this is a feature that most vector graphics programmes will have. I don’t always draw schematics with the grid on, but when I’m struggling to get a drawing to look even and symmetrical, I love using the grid.
5. Use varying line weights
This is another tip that I heard at university and wow! It makes a massive difference in giving your knitting pattern schematics depth and definition.
I use the thickest line for the outline of my schematic - this gives the drawing weight and grounds it on the page. I then use a medium line for what I call the “style lines”. These are the seams or any significant shaping lines such as your raglan shaping in a seamless sweater. Finally, I use the finest line for the details, which includes the trims or even any stitch panels.
6. Start angular and smooth your lines out afterwards
Even though your knitting pattern design will likely be full of curved lines, I suggest mapping out each section of your schematic using straight lines initially. This speeds up the process and gives you a good foundation for your drawing. Then, you can manually adjust the lines to create the curves that you want.
7. Use the flip tool
This is another tool that my university teacher used a lot. He used the flip tool in his vector graphics programme to make perfectly symmetrical flat drawings - they were stunning. I’ve never quite mastered that side of things, however, I use this tool all the time to quickly mirror raglan seams or trim lines.
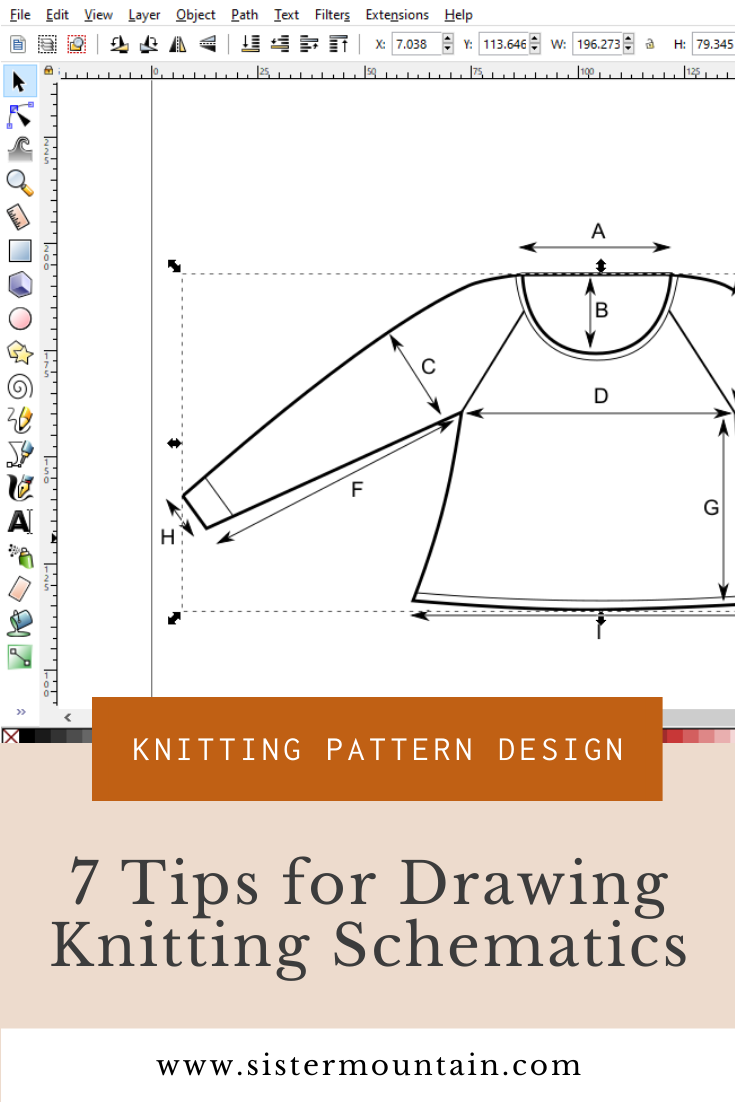
Bonus Tip: Remember the purpose of your schematic
The purpose of your schematic is to clearly inform makers of the dimensions of each size in your design. You could draw a beautifully realistic looking schematic, but if it isn’t clear where the finished measurements are taken from, it’s useless. Focus on making your schematic as easy to “read” as possible.
What are your schematic drawing tips?
Do you have any tips and tricks for drawing knitting pattern schematics? Share them in the comments section below. Your skills and experiences could help out another member of the Sisterhood. Thanks in advance for sharing!