Neat Edges: How to Knit a Tubular Selvedge
Who else loves experimenting with new finishing techniques?
They are one of my favourite ways to "upgrade" my knitting. Not only does great finishing improve the overall aesthetics of your work, but it can also make it more practical. I'm all about form and function over here.
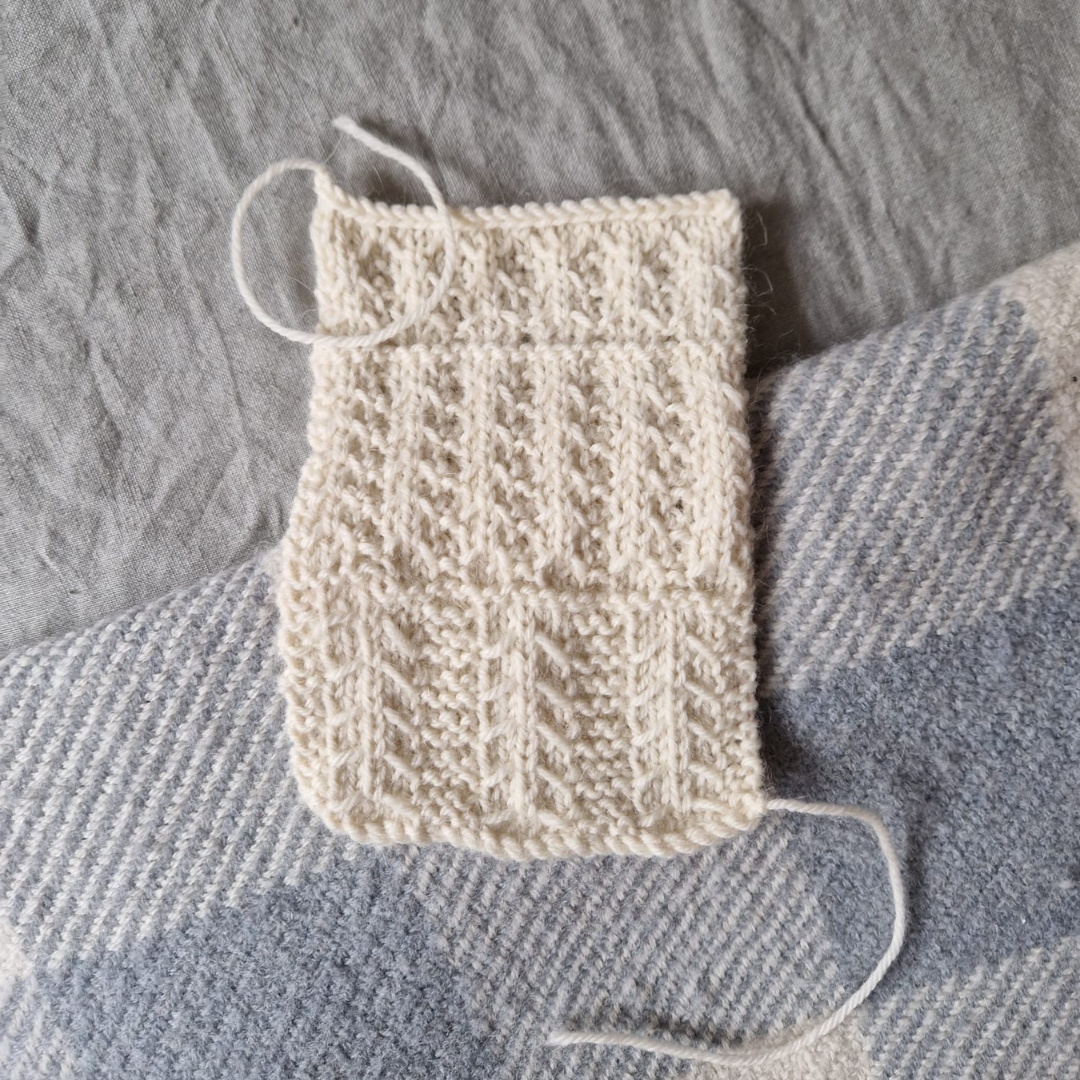
I'm currently in the process of designing a new scarf pattern (you can get a glimpse of it on Instagram) and wanted to choose a beautiful, yet minimal way of neatening the edges. I'm using moss stitch trims at both ends of the scarf, so I considered using moss stitch borders too, but found the overall effect too busy in the end. Instead, I opted for a wonderfully simple tubular selvedge.
For those who are unfamiliar with this edging, a tubular selvedge creates something similar to an i-cord, running along the edge of your work, but it is knitted integrally with the rest of the piece.
Tubular Selvedge Tutorial
The tubular selvedge is incredibly easy to master once you know how it works. I've created a video to show you how, but if you learn better from written instructions and photographs, scroll down to find them beneath the video
Keep in mind: I have worked with 5 stitch selvedges in the video below, but you can use anything from 2-5 stitches in your own selvedge.

Method
You will need: yarn, matching needles and 2 stitch markers.
Cast on in chosen method (I used the cable cast on) and place your stitch markers 2-5 stitches from each edge, depending on how wide you would like your tubular selvedge to be. Remember, the finer your yarn, the wider you should make your selvedge, otherwise, it won't be visible.
With the right side facing, knit until the first marker.
Work in chosen stitch pattern until the second marker. I have used moss stitch in this example.
With the yarn at the back of your work, slip the remaining stitches after the marker purlwise. Turn.
With the wrong side facing, purl until the first marker, making sure that you are pulling the yarn tightly to avoid a float. You can see the tube start to form here.
Work in chosen stitch pattern until the second marker.
With the yarn at the front of your work, slip the remaining stitches after the marker purlwise. Turn.
Repeat steps 2-7 until your work is the length you want it to be.
Notes:
Make sure that, when you are working those stitches before the first stitch marker, you are pulling the yarn tightly to avoid creating a float. This is how the tube is formed. You might need to pull on the base of the tubular selvedge every time you work those first stitches to allow the tube to sit comfortably on the needle.
You might have already noticed that you are knitting half the number of rows in the selvedge as you are knitting in the main body of the work, which can cause rippling in the fabric. In many cases, simple blocking will flatten out any rippling, but in some cases, you might need to make row adjustments in the selvedge to make it lie flat.