How to Knit the Alternating Cable Cast-On for 2x2 Rib
Until a couple of years ago, I had no idea that there are multiple cast-ons that serve different purposes. I just used the cable cast-on for everything, regardless of whether it was optimal or not.
Since then, I have discovered a whole world of cast-ons that have enormously improved my handknits. One of them is the Alternating Cable Cast-On.
One of the Best Cast-Ons for Ribbing
This cast-on will work well with most bottom-up sweaters that use either a 1x1 or 2x2 rib, such as my Split Stone sweater (which I will be releasing in May - yippee!)
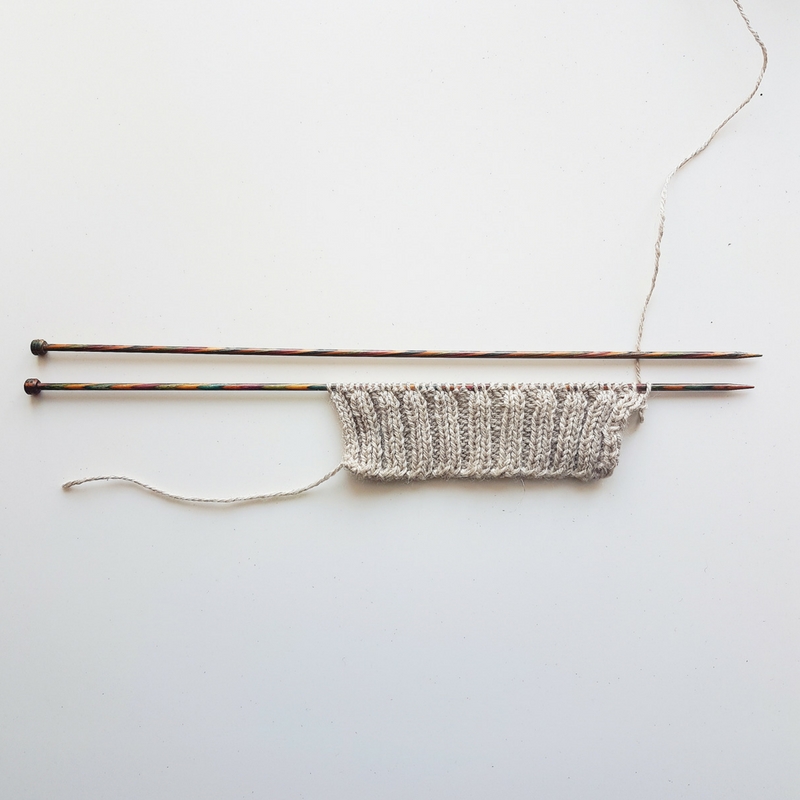
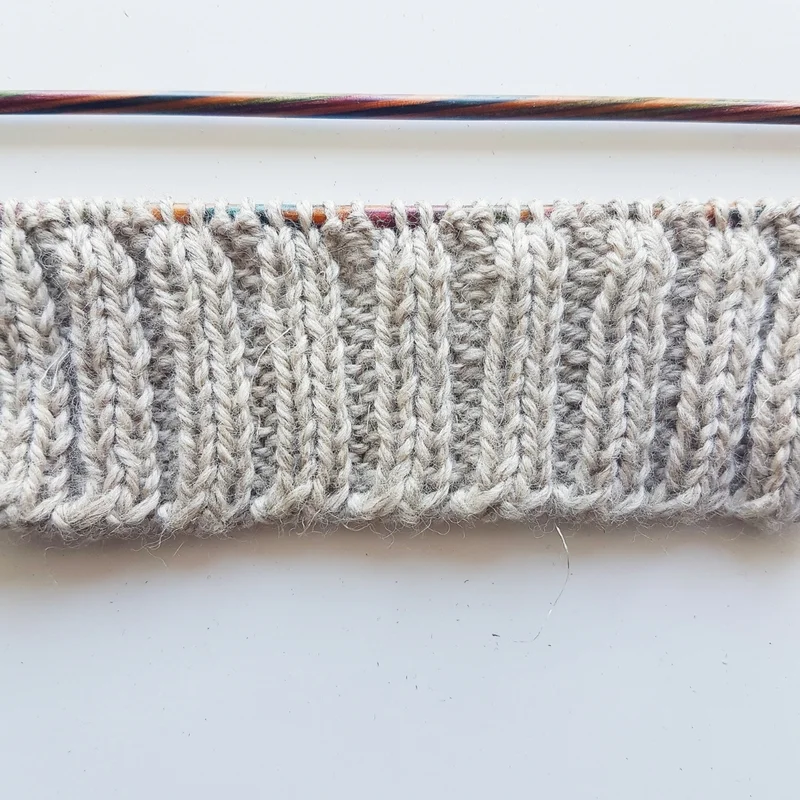
There are many benefits to using this cast-on over a classic cable cast-on. For a start, it's much neater and more attractive, since the cast-on stitches blend seamlessly into the ribbing. Additionally, it is not as firm and stretches better, which is ideal for ribbed trims.
If you are someone who can't get on with tubular cast-ons, this could be a fantastic alternative. Not only is it simpler to learn; it's quicker too.
In today's knitting tutorial, I will teach you:
How to knit the cable cast-on for 1x1 ribbing
How to transfer the stitches into a 2x2 rib layout
Alternating Cable Cast-On Tutorial
If you prefer to read written instructions over watching videos, the instructions for the alternating cable cast-on can be found below.
How to Knit the Alternating Cable Cast-On (Written Instructions)
Create a slip knot and put it on the left-hand needle.
Knit into the slip knot and place new stitch on the left hand-hand needle.
From the back of the work, purl into the gap between the first and second stitches on the left-hand needle, placing the new stitch onto the left-hand needle.
From the front of the work, knit into the gap between the first and second stitches on the left-hand needle, placing the new stitch onto the left-hand needle.
Repeat steps 3 and 4 until you have the desired number of stitches, ending with a purl stitch.
From here, you can either work these stitches in 1x1 rib as they are set up or you can transfer the stitches into a 2x2 rib by doing the additional steps below...
k1.
Insert right-hand needle into the back of the second stitch on left-hand needle.
Slip the second stitch onto right-hand needle, forcing the first stitch off the needle (this will result in a live stitch.)
Using the left-hand needle, catch the live stitch at the front of work.
Slip the first stitch on the right-hand needle back onto the left-hand needle
k1, p2
Repeat steps 7-12 to the end of the round.
Try it for Yourself
If you're someone who tends to use the same old cast-on for all of your projects, I highly recommend that you try the alternating cable cast-on for the next project you start. I actually use this cast-on in my Split Stone sweater, which will be released on May 2nd 2017. You will be thrilled with how seamlessly the cast on blends into the ribbing!